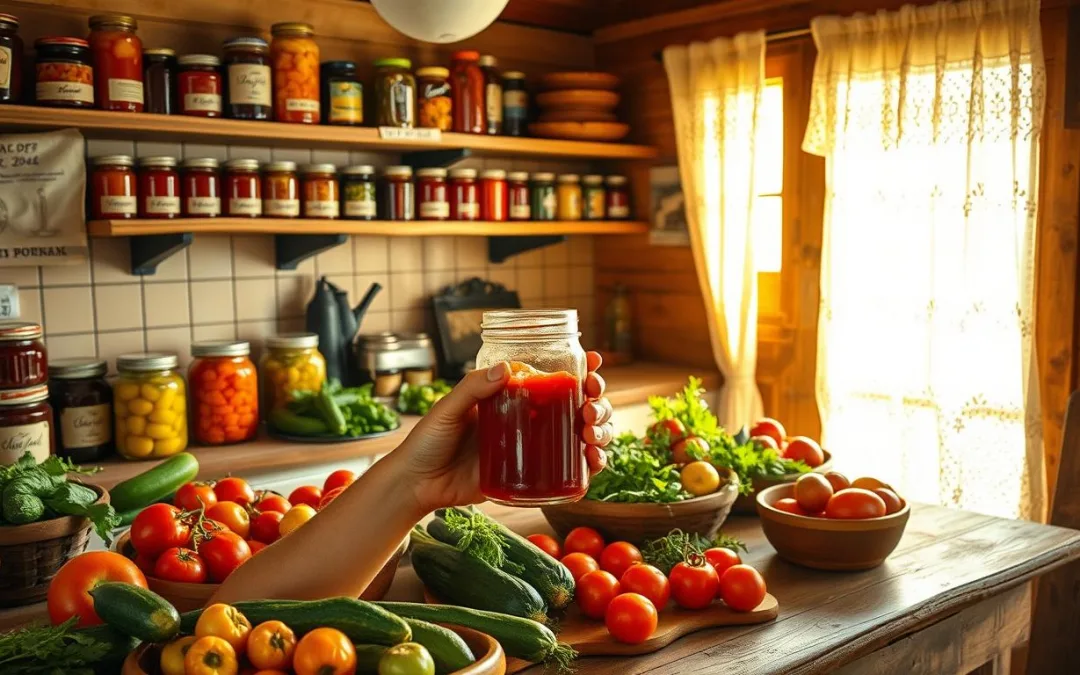
Canning is a tradition that lets families keep summer’s flavors all year. It connects us to our farming roots. We turn fresh produce into tasty, long-lasting foods.
I love canning at home. It’s more than just saving food. It’s a way to enjoy the best of the season, even when it’s gone.
Homemade jams and pickles are just the start. These methods fill our pantries with delicious, homemade goods. Each jar is a story of love and care for the seasons.
Key Takeaways
- Canning preserves summer’s peak flavors year-round
- Proper safety techniques are key for canning success
- Homestead canning connects generations through food traditions
- Diverse recipes let us preserve many fruits and vegetables
- Home canning gives us healthier, preservative-free food
Essential Equipment and Safety Guidelines for Home Canning
Starting your DIY canning recipes journey needs careful preparation and safety knowledge. Home canning is a fun way to keep seasonal produce fresh. But, it requires precision and knowledge to keep food safe.
Choosing the Right Canning Method
There are two main canning methods: water bath and pressure canning. Each method is used for different types of food based on their acidity.
- Water Bath Canning: Best for high-acid foods
- Pressure Canning: Needed for low-acid foods
The main difference is in temperature. Water bath canning reaches 212°F. Pressure canning goes up to 240-250°F, killing harmful bacteria.
Sterilization Techniques
Proper sterilization is key to avoid foodborne illnesses. Always clean and sanitize your Mason jars, lids, and tools before canning.
| Sterilization Method | Recommended Process |
|---|---|
| Boiling | 10-minute submersion in boiling water |
| Dishwasher | High-temperature sanitize cycle |
| Oven | 225°F for 10-15 minutes |
Seal Testing and Storage
After canning, check jar seals by pressing the lid center. A sealed lid won’t flex. Store sealed jars in a cool, dark place. Check them often for spoilage signs.
Remember: When in doubt, throw it out!
By following these guidelines, you’ll make safe, tasty DIY canning recipes. They’ll keep summer’s bounty fresh for months.
Homemade Tomato Sauce and Preserves
Starting with the right tomatoes is key to making delicious preserves. For organic canning, use paste tomatoes for their rich flavor. You’ll need about 10 lbs of tomatoes for a big batch.
Creating the perfect tomato sauce is all about the details. Here are the essential steps for making top-notch preserves:
- Wash and trim tomatoes thoroughly
- Use a food mill to remove skins and seeds
- Add 2 large onions and 12 garlic cloves for depth of flavor
- Include 1/4 cup olive oil for smooth texture
- Season with 1/4 cup coarse sea salt and 2 tablespoons brown sugar
For safe canning, adding acid is important. Mix in 6 tablespoons of bottled lemon juice. The reduction process takes 3-5 hours, concentrating those incredible tomato flavors. Each pint jar needs 1 tablespoon of lemon juice, and quarts need 2.
Processing your preserves is easy. You’ll spend about 3 hours, with 35 minutes for pint jars and 40 minutes for quarts. Sealed jars can last up to 18 months, bringing summer flavors to your table all year.
Pro tip: Always use new canning lids and check seals 12-24 hours after processing to ensure food safety.
From 45 pounds of fresh tomatoes, you’ll get about 7 quarts of sauce. Your homemade preserves will show off your cooking and gardening skills.
Traditional Pickle Recipes and Fermentation Techniques
Preserving traditional food is more than a hobby. It connects us to our culinary past. Homesteading tips for pickling turn cucumbers into tasty, crispy treats that celebrate summer’s bounty.
Fermentation is a magical process. It turns simple ingredients into complex, flavorful foods. By learning the science of pickling, you can make amazing preserved foods at home.
Crispy Dill Pickle Recipe
Making the perfect pickle needs attention and the right ingredients. Here’s a simple way to make crisp, tangy pickles:
- Select fresh, firm cucumbers (preferably picked in the morning)
- Prepare a 2% brine solution (1 tablespoon fine sea salt per 4 cups water)
- Add flavor enhancers like garlic, dill, and peppercorns
Low-Temperature Pasteurization Method
The low-temperature pasteurization method keeps your pickles crunchy and safe. It’s approved by the National Center for Home Food Preservation. This method preserves the pickles’ texture.
| Fermentation Parameter | Recommended Value |
|---|---|
| Temperature Range | 65-80°F (Ideal: 70°F) |
| Fermentation Duration | 5-7 days |
| Salt Concentration | 2 tablespoons per quart of water |
| Storage Temperature | 32-50°F |
Specialty Pickle Variations
Try unique flavors by adding different herbs and spices. Pro tip: Grape leaves can help keep pickles crisp during fermentation.
- Spicy garlic dills
- Herb-infused pickles
- Lacto-fermented variations
Successful traditional food preservation is about patience, precision, and passion. Your homemade pickles will taste amazing. They’ll also connect you to generations of culinary wisdom.
Sweet Fruit Preserves and Jams

Making homemade preserves is like creating art with seasonal fruits. Strawberry jam is a timeless favorite, capturing the essence of summer’s sweetness.
Choosing the right ingredients is key when making preserves. Strawberries need special care during canning. Here are some tips for making perfect fruit preserves:
- Use fully ripe, high-quality strawberries
- Add lemon juice to increase acidity for safe canning
- Consider natural sweetening alternatives
Natural sweeteners can make your preserves even better. Honey is a great sugar substitute, needing only 7/8 cup for every 1 cup of sugar in jam recipes.
| Preservation Method | Storage Duration |
|---|---|
| Water Bath Canned Jam | 1-2 years |
| Refrigerated Jam | 1 month |
| Freezer Jam | 1 year |
The cooking process needs careful attention. It takes about 30 minutes to thicken strawberry jam. After adding sugar, a 1-minute boil is needed to activate pectin. Canning jars for 10 minutes in a rolling boil ensures a perfect seal and long-lasting preservation.
Pro tip: Small batches preserve the most authentic fruit flavors and ensure optimal jam consistency.
Your homemade preserves will taste amazing and be healthy. A single tablespoon of strawberry jam is a delicious and nutritious treat, making it a guilt-free choice.
Homestead Canning Recipes for Seasonal Vegetables
Preserving your garden’s bounty through canning is key for homesteaders. Vegetables are packed with nutrients. They can be turned into tasty, long-lasting foods with the right canning recipes.
Preserving seasonal vegetables needs focus and knowledge of canning methods. Let’s look at the best ways to keep your harvest fresh.
Green Bean Preservation Methods
Green beans are great for canning at home. Here are some important preservation steps:
- Pressure canning for long-term storage
- Blanching before canning to keep color and texture
- Ensuring proper sterilization of jars
Nutrition tip: 8 pickled green beans have just 9 calories and 83mg of sodium. They’re a healthy choice for preserved vegetables.
Root Vegetable Canning Guide
Root vegetables are perfect for preserving. Carrots, beets, and potatoes can be made into tasty canned goods with the right methods:
- Clean and prepare vegetables well
- Use pressure canning for low-acid vegetables
- Process at correct pressure settings based on altitude
“Pressure canning transforms fresh vegetables into nutritious, long-lasting pantry treasures.” – Homestead Preservation Expert
Mixed Vegetable Medley Recipes
Mixed vegetable medleys offer creative and versatile canning options. Mix different seasonal vegetables to create unique flavors that will enhance your meals all year.
When canning vegetables, remember that proper technique is key for flavor and safety. Always follow recommended processing times and pressure settings for your altitude.
Artisanal Salsa and Condiment Recipes
Making homemade salsa is a fun way to use fresh garden produce. It turns simple ingredients into tasty condiments that make any meal better. These condiments keep the taste of summer alive all year.
Let’s make a classic cilantro lime garden salsa. It’s easy to make and full of flavor:
- 5 lbs of Roma tomatoes
- 2 finely diced onions
- 2 jalapeños (seeds optional for heat control)
- 6 minced garlic cloves
- 1/2 cup fresh cilantro
- 1/2 cup fresh lime juice
Customizing your salsa is the best part. Change the jalapeño amount to your liking. For safe canning, add lime juice and vinegar to keep the acidity right.
Pro tip: Use paste tomatoes like Roma for a thicker, more robust salsa texture.
When canning, follow water bath canning steps. Pint jars need 20 minutes, quart jars 25. This way, your salsa stays good for 12-18 months, bringing summer’s taste to any time.
Don’t just stick to tomato salsa. Try fruit-based or herb mixes to make your own special condiments. Let your creativity shine in the kitchen.
Heritage Apple and Pear Preserving Methods
Exploring traditional food preservation shows us the art of saving seasonal fruit flavors. Organic canning recipes connect us to our farming heritage. They also give us tasty ways to enjoy the harvest all year.
Preserving heritage fruits like apples and pears needs careful steps and focus. This turns fresh fruit into tasty spreads and sauces. We can enjoy them long after the harvest. Vintage canning methods link us to old culinary traditions that have fed families for ages.
Classic Apple Butter Recipe
Apple butter is the top of traditional food preservation. It’s made with just a few ingredients but packs a lot of taste. Here’s how to make it:
- Choose firm, ripe organic apples
- Cook them slowly with cinnamon and nutmeg
- Reduce until it’s thick and caramelized
- Can it in sterilized jars for long storage
Spiced Pear Preserves
Pear preservation needs to be precise. Here are some tips for canning pears:
- Use 2-3 pounds of pears per quart jar
- Prepare a lemon juice bath to stop discoloration
- Process pint jars for 25 minutes, quart jars for 30 minutes
- Leave 1/2 inch headspace in jars
Fruit Sauce Variations
Home canners can try new things with fruit sauces. Mix different fruits or add special spices. Maple syrup is a great sweetener that adds depth to traditional recipes.
Advanced Canning Techniques for Meat and Legumes

Learning to can meats and legumes is different from canning fruits and veggies. These foods need special pressure canning to keep them safe and stop bacteria from growing.
Pressure canning is key for canning low-acid foods like meats. It helps make meals that are safe to eat for up to 18 months. Learning advanced canning techniques can also improve your cooking skills and how you store food.
Dried Bean Canning Fundamentals
Here’s how to can dried beans:
- Soak beans overnight to make them easier to digest
- Use 3/4 pound of dried beans per quart jar
- Leave 1 inch of space at the top of jars
- Optional: Add 1/2 teaspoon salt for pints, 1 teaspoon for quarts
Pressure Canning Processing Guidelines
It’s important to get the pressure and time right for safe canning:
- Set pressure at 10 pounds at sea level
- Adjust pressure for higher altitudes
- Process pints for 75 minutes
- Process quarts for 90 minutes
Important: Always use tested recipes and follow recommended times to avoid food poisoning.
Beef Stew Canning Recommendations
Here’s a good mix for canned beef stew:
- Use 4-5 pounds of stewing beef, cut into cubes
- Add 12 cups of potatoes (about 5 pounds)
- Include 8 cups of carrots (around 2.5 pounds)
- Use 3 cups of onions
- Use 12 cups of beef stock
By using these canning methods, you can make healthy, long-lasting meals. These meals will remind you of summer’s best flavors.
Troubleshooting Common Canning Problems
Mastering Mason jar canning needs you to know about common problems. Even skilled canners face issues that can affect food safety and taste.
Good canning is all about paying attention and knowing the right techniques. I’ll give you tips to solve common issues. This way, your homemade preserves will stay safe and tasty.
Preventing Seal Failures
Seal failures can ruin your canning. Here are some ways to avoid this:
- Wipe jar rims clean before sealing
- Apply lids with a “finger-tip-tight” touch
- Make sure jar rims are even
- Don’t over-tighten the lids
“A proper seal is the foundation of safe home canning” – Preservation Expert
Maintaining Proper Acidity Levels
Acidity is key to stopping bacteria growth. For safe canning, follow these tips:
- Use pH testing strips to check acidity
- Keep pH levels below 4.6
- Add bottled lemon juice for acidity
- Stick to tested recipes
Storage and Shelf Life Guidelines
Right storage keeps your canning safe and tasty. Remember these important points:
- Store jars in cool, dark places
- Check seals before long storage
- Refrigerate or throw away jars with bad seals
- Know the shelf life for each preserve
By focusing on these tips, you’ll become a skilled home canner. You’ll preserve your harvest safely and with confidence.
Conclusion
Exploring homestead canning recipes shows it’s more than just a kitchen skill. It lets families save food by up to 30% during peak seasons. Learning these techniques helps homesteaders connect with their farming roots.
Food preservation is not just practical. It’s a way to be self-sufficient and ready for challenges. With these skills, families can enjoy nutritious foods for up to a year.
Safety is key in canning. It’s important to follow tested recipes and sterilize properly. Embracing these methods helps reduce waste and brings joy from seasonal harvests.
Canning is a journey of learning and connection. Every jar is a piece of creativity and self-reliance. As you grow, each batch is a way to honor tradition and feed your family with love.
FAQ
What equipment do I need to start home canning?
Is home canning safe for beginners?
How long can home-canned foods be stored?
What’s the difference between water bath and pressure canning?
Can I modify canning recipes?
What are the most common mistakes in home canning?
How do I know if my canned goods have sealed correctly?
What types of produce are best for home canning?
Source Links
- Canning Recipes that Actually Taste Good – https://www.theseasonalhomestead.com/canning-recipes-that-actually-taste-good/
- 21 Canning Recipes to Preserve Your Harvest the Way Grandma Did – https://homesteadhow-to.com/canning-recipes/
- 58 Timeless Canning Recipes Only Grandma Knew to Make – https://www.tasteofhome.com/collection/vintage-canning-recipes/?srsltid=AfmBOoowwSKlNd-FP7Mojc8VlYsC_SRgPiQ5Js5ZHTTaecplBk3Q3PSG
- Canning 101: Introduction to Canning – https://homesteadingfamily.com/preservation-101-intro-to-canning/
- Canning Tips: Essential Guide for Preserving Your Food Safely – https://thehomesteadchallenge.com/canning-tips/
- The Ultimate Guide to Canning Safety • The Prairie Homestead – https://www.theprairiehomestead.com/2020/03/canning-safety.html
- Tomato Sauce Canning Recipe and Guide | Preserve Summer’s Bounty — Under A Tin Roof – https://underatinroof.com/blog/tomato-sauce-canning-recipe-amp-guide
- How to Can Tomato Sauce (My Favorite All-Purpose Version) • The Prairie Homestead – https://www.theprairiehomestead.com/2020/09/can-tomato-sauce.html
- Homemade Fermented Pickle Recipe | The Prairie Homestead – https://www.theprairiehomestead.com/2015/08/fermented-pickle-recipe.html
- Fermented Pickles – Quick & Easy Old-Fashioned Recipe – https://melissaknorris.com/podcast/old-fashioned-salt-and-water-fermented-pickles/
- Best Homemade Garlic Dill Pickles Recipe + Canning Instructions – https://melissaknorris.com/best-homemade-pickles-recipe/
- Homemade strawberry jam – https://www.farmhouseonboone.com/homemade-strawberry-jam-sweetened-with-honey-2/
- How to Make and Store Homemade Jam and Fruit Preserves – Curly Girl Kitchen – https://curlygirlkitchen.com/how-to-make-homemade-jam-fruit-preserves/
- 58 Timeless Canning Recipes Only Grandma Knew to Make – https://www.tasteofhome.com/collection/vintage-canning-recipes/?srsltid=AfmBOooDzsCTEPZerfN59uhvXD8QzBCSZoWX_yVHcOh_edKVLHXpHLzB
- 100+ Pressure Canning Recipes – https://creativecanning.com/pressure-canning-recipes/
- The Best Home Canned Salsa Recipe – Easy (Video) – https://wagonwheelhomestead.com/the-best-home-canned-salsa-recipe/
- Canning Recipe for Cilantro Lime Garden Salsa – Hopewell Heights – https://hopewellheightsblog.com/cilantro-lime-garden-salsa-for-canning/
- How to Can Pears without Sugar | The Prairie Homestead – https://www.theprairiehomestead.com/2014/09/how-to-can-pears-without-sugar.html
- Canning Pears in Maple Syrup • The Prairie Homestead – https://www.theprairiehomestead.com/2019/10/canning-pears-in-maple-syrup.html
- Canning 101 Water-Bath vs. Pressure Canner – https://melissaknorris.com/pioneering-today-canning-101-water-bath-vs-pressure-cooker/
- How to Can Dry Beans • The Prairie Homestead – https://www.theprairiehomestead.com/2013/04/how-to-can-dry-beans.html
- Canning Beef Stew – https://practicalselfreliance.com/canning-beef-stew/
- Canning Problems and Solutions: Siphoning (Liquid Loss in Jars) – https://melissaknorris.com/podcast/canning-problems-and-solutionsl-siphoning/
- Canning Mistakes to Avoid (for Water Bath & Pressure Canning) – https://homesteadingfamily.com/canning-mistakes-to-avoid/
- 11 Potential Water Bath Canning Problems and Solutions – https://www.hiddenspringshomestead.com/water-bath-canning-problems-and-solutions/
- Canning on the Homestead: A Time-Honored Tradition for Sustainable Living – https://www.theeasygarden.com/threads/canning-on-the-homestead-a-time-honored-tradition-for-sustainable-living.25132/
- Avoiding common canning mistakes – Backwoods Home Magazine – https://www.backwoodshome.com/avoiding-common-canning-mistakes/
- Essential Canning Recipes for Your Homestead: Preserving the Harvest – https://perkydove.com/2024/08/13/essential-canning-recipes-for-your-homestead-preserving-the-harvest/?srsltid=AfmBOorz1YrIKCuFLRBmYw8w8KvTZa9Z03bXJVvHUO_Q88uVmfoi2KFf
